Redefine Banking on the Go
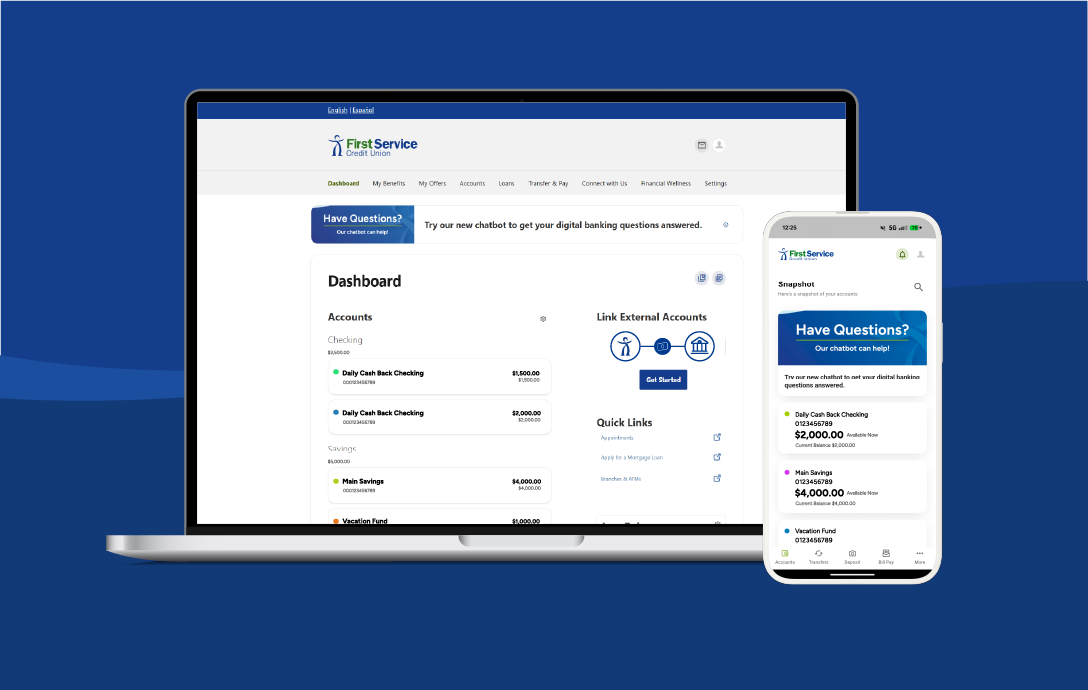
We know that you don’t always have time to stop by a branch. That’s why the First Service Digital Banking app puts all of your banking needs in the palm of your hand.
With quick and easy access to your account, you will enjoy a consistent, secure experience no matter where you go or which device you bring.
What You Can Do with First Service Digital Banking
Digital Banking FAQs
Can't find what you're looking for? Ask our chatbot. Prefer to watch a video? Visit our video FAQ page.
Getting Started
- On desktop, go to Settings > Security
- On mobile, go to More > Settings > Security
- Select the pencil icon next to your password
- To update your username, additional security measures are required to keep your account safe. Please contact us at 713-676-7777 if you wish to update your username
To get started with digital banking, you will need to enroll from our website or the mobile banking app.
On a mobile device, launch the First Service app and select Register a New Account at the bottom of your screen and follow the prompts.
From the FSCU.com website, click the green Log in button at the top right. The login screen will slide in. Then select Register a New Account and follow the prompts.
- On the digital banking login screen, select Forgot Username or Password
- Select the second option, Forgot Username/Password and follow the instructions on the following screen on how to reset your username and/or password
In the mobile app, select the Person Icon, go to Settings > Biometrics and make sure that the feature is switched on.
This feature is configured on the mobile app only and does not apply to the desktop browser experience.
Account Management
Your member number is a 2-to-10-digit number that identifies your membership with First Service Credit Union.
The Easiest way: Your member number is already visible in your account numbers on the Home Screen. Look at any account number; the digits after the zeros are your member number. For example, if your checking account number is 1234500067890, your member number is 67890.
Alternative method via eStatements:
- On desktop, go to Accounts > eStatements
- On mobile go to More > Accounts > eStatements
- Select Statements, then View Statements
- Your member number appears next to your name at the top of the statement
Finding Your Account Number
Your 13-digit account number identifies a specific deposit account or loan. Use this number when setting up wire transfers, direct deposits, or ACH transactions.
- On the Home Screen, you will see your unhidden accounts.
- Under the name of each account, you will see your account number.
- On mobile, select the individual account, then Show Details.
- On desktop, go to Settings > Accounts
- On mobile, go to More > Settings > Accounts
- Select Link an External Account
- Select your preferred method of authentication
- Agree to the Terms and Conditions
- Choose or search for the desired financial institution, then select it
- To log in, use your credentials for that account, not your First Service account
- On desktop, go to Settings > Accounts Overview
- On mobile, go to More > Settings > Accounts Overview
- Here you can see the balances of all un-hidden accounts
- Select an account to view more detailed information about it
- On desktop, go to Settings > Accounts
- On mobile, go to More > Settings > Accounts
- Select the edit button (an arrow icon in mobile, a pencil on desktop) to edit the Nickname field
- Select Save to save your nickname
- On desktop, go to Settings > Accounts
- On mobile, go to More > Settings > Accounts
- Select the edit button--a pencil icon--next to the information you wish to change. On mobile, tap the arrow first to reveal the edit button
- Select Hide This Account
- Select Save
To change an account's color:
- On desktop, go to Settings > Accounts
- On mobile, go to More > Settings > Accounts
- Select the edit button--a pencil icon--next to the information you wish to change. On mobile, tap the arrow first to reveal the edit button
- Use the Account Color menu to select a new color
- Select Save
- Select the desired account from the Main Menu
- All transactions will be displayed with dates, descriptions, amounts, and balances
- Select the magnifying glass to use the search function to find specific transactions or organize transactions by key terms
- On desktop, go to Accounts > Transaction Disputes
- On mobile, go to More > Accounts > Transaction Disputes
- Select Start a Dispute
- Select the transaction type (e.g., Card or Zelle)
- Select the date range for the transaction
- Select the transaction you want to dispute
- Provide the information required: transaction initiation, problem with merchant, etc.
- Submit the dispute
- On desktop, go to Accounts
- On mobile, go to More > Accounts
- Select the account you want to view
- Select the Dividends & Interest tab
- The account will expand, and you will be able to view Year-to-Date Totals, Dividends Earned, and Interest Paid
On Desktop
- From the Main Menu, select the desired account
- On the Analytics tab, view your account's balance history and spending habits within 1, 3, or 6 month intervals
- From the Main Menu, select More > Financial Wellness > Spending
- View your account's balance history and spending habits within 1, 3, or 6 month intervals
Profile & Security Settings
Follow these steps to enable text alerts.
- On desktop, go to Settings > Contact
- On mobile, go to More > Settings > Contact
- Select the phone number to which you would like us to send text alerts. If that number is unlisted you can add it here.
- Flip the Enable SMS text messages switch to the on position
- Select a method of delivery for your OTP (one-time password), email or text message
- Type the password you just received into the OTP field
- You will then receive an SMS confirmation code on the mobile device you have listed for text alerts. Type this code into the SMS confirmation field to enable text messages.
- Go back to Settings and select Alerts
- Select an alert category: Accounts, Authentication, Card, etc.
- Select the action that will trigger an alert: Automatic Deposit, Balance, Check Cleared, etc.
- Set the SMS switch to the on position to enable text alerts.
Note: Standard text messaging rates will apply.
To update your contact information:
- Click on the Person Icon at the top right of your screen
- Select Settings > Contact
- Select the edit button--a pencil icon--next to the information you wish to change. On mobile, tap the arrow first to reveal the edit button
- Save your changes
- If there is a security prompt, First Service will email or text you an OTP. Use it to verify your identity
To add or edit phone numbers:
- Go to Person Icon > Settings > Contact
- Select the edit button--a pencil icon--next to the information you wish to change. On mobile, tap the arrow first to reveal the edit button
- Update the phone number
- Check the “I would like to receive SMS text messages to this number” box to receive SMS text messages if desired
- Check "Set As Preferred Contact Phone" to make it your primary number
- Select Save Changes
- If enabling text messages, you will receive an OTP for verification
To update your profile picture:
- Go to Person Icon > Settings > Profile
- Select the Edit button beneath the generic profile picture
- Select the + Upload Image button
- Choose an image file from your personal computer or mobile computing device
- Select Save Changes
- Go to Person Icon > Settings > Security > Two-Factor Authentication
- Here, you can enable 2FA for each login using:
- SMS
- Voice Call
- 2FA App (e.g., Google Authenticator)
- Select the pencil icon next to your preferred method
- Fill in the email, SMS, and 2FA App fields with the desired contact information
- For 2FA App, select Enroll, then scan the QR code with your authenticator app, and enter the code. This option is only compatible with mobile devices on which the 2FA application has been downloaded. You can download this application from your phone’s app store
Note: Two-factor authentication cannot be activated or updated on mobile.
- Click on the Person Icon at the top right of your screen
- Select Settings > Profile
- View your profile information and recent changes under Recent Login Activity
- Select Show More to see older account activity
Note: This option is only available on the desktop.
Application tokens are used to prevent unwanted access to secure financial information. To manage application tokens:
- Go to Person Icon > Settings > Applications
- View all devices/applications with active tokens
- Select the down arrow icon to expand details for any application
- Select Revoke to cancel the token for a lost or stolen device
External Accounts & Linking
- From the Dashboard, go to Transfers > Add an Account
- Choose from four options:
- Add an External Account - Select your financial institution from the list
- Manually Add an External Account - Enter routing and account numbers manually
- Link to Another First Service Credit Union Member's Account - Send money to other FSCU members
- Add an External Account to View its Balance - Add view-only access to external accounts
Follow the remaining prompts for your selected option
Note: It may take a few days to link an external account using the manual method.
On Desktop
- From the Main Menu, go to Settings > Accounts
- Select + Link an External Account
- Choose from four options:
- Add an External Account - Select your financial institution from the list
- Manually Add an External Account - Enter routing and account numbers manually
- Link to another First Service Credit Union Member's Account - Send money to other FSCU members
- Add an External Account to View its Balance - Add view-only access to external accounts
Follow the remaining prompts for your selected option
Note: It may take a few days to link an external account using the manual method.
Cards & Card Management
To block a card:
- On desktop, go to Accounts > Manage My Cards
- On mobile, go to More > Accounts > Manage My Cards
- Select the card
- Select Alerts & Controls
- Toggle the Block this Card switch to the right
- Select a delivery method for notifications (Email or Push)
Note: To unblock your card, return to Card Management and select the unblock option.
To manage your cards:
- On desktop, go to Accounts > Manage My Cards
- On mobile, go to More > Accounts > Manage My Cards
- Select the card you want to manage
- Options available:
- View Details - Enter an OTP to view full card number and CVV
- Alerts & Controls - Set up card alerts and spending controls
- Replacement Options - Order a replacement card
- Update PIN - Change your debit card PIN (debit cards only)
- Travel Notices - Add travel notifications
- On desktop, go to Accounts > Manage My Cards
- On mobile, go to More > Accounts > Manage My Cards
- Select the card you wish to replace
- Select the Replacement Options
- Select a reason the card must be replaced: Lost, Stolen, or Damaged
- Select Continue
- Confirm the request
- On desktop, go to Accounts > Manage My Cards
- On mobile, go to More > Accounts > Manage My Cards
- Select the card
- Select the gear icon or Alerts & Controls
- Select the pencil icon or Manage Card Alerts
- Select a card alert option
- Select a delivery method (email or push)
- Select Save
To set up card controls:
- On desktop, go to Accounts > Manage My Cards
- On mobile, go to More > Accounts > Manage My Cards
- Select the card
- Select the gear icon or Alerts & Controls
- Select the pencil icon for Manage Card Controls
- Block/deny transactions for:
- Locations
- Transaction Limits
- Transaction Types
Note: Controls actively block transactions, unlike alerts.
- On desktop, go to Accounts > Manage My Cards
- On mobile, go to More > Accounts > Manage My Cards
- Select the card
- Select None Scheduled or the travel notices section
- Select Add New Travel Notice
- Enter:
- Start Date
- End Date
- Destination (Domestic or International)
- Location (State for domestic, Country for international)
- Select Add Destination
To update your debit card PIN:
- On desktop, go to Accounts > Manage My Cards
- On mobile, go to More > Accounts > Manage My Cards
- Select the card whose PIN you want to update
- Select Update PIN
- Enter your new PIN and confirm it
- Enter the card expiration date
- Select Update PIN
Note: PIN updates are ONLY available for debit cards, not credit cards.
- Go to Accounts > Manage My Cards
- Select the card showing Finish Setup
- Select Card Activation
- Enter the CVV Number
- Select Activate Card
- Select PIN Setup
- Enter a new PIN and confirm it
- Enter the card expiration date
- Select Save
Transfers & Payments
- Go to Transfer & Pay > Transfers
- On the Make a Transfer tab, complete the required fields:
- From Account
- To Account
- How Much
- When (to send the money, now or scheduled, one time or recurring)
- Optional memo
- Select Review Transfer
- Review the details and select Submit Transfer
- Select View Transfer Activity at any time to review details
To transfer money to another FSCU member:
On Mobile
- From the Dashboard, go to More > Transfers > Make a Transfer
- In the From Account drop-down menu, select the account from which you want to send money
- In the To Account drop-down menu, select the desired account. If you have not linked the other First Service account, select + Add an Account and follow the Add an Account workflow
- In the How Much field, enter the desired transfer amount
- With the When drop-down menu, indicate whether this will be a recurring or one-time payment.
- Leave a Memo (optional)
- Select Review Transfer
On Desktop
- From the Dashboard, go to Transfer & Pay > Transfers
- On the Make a Transfer tab, provide the requested information
- In the From Account drop-down menu, select the account from which you want to send money
- In the To Account drop-down menu, select the desired account. If you have not linked the other First Service account, select + Add an Account and follow the Add an Account workflow
- In the How Much field, enter the desired transfer amount
- With the When drop-down menu, indicate whether this will be a recurring or one-time payment.
- Leave a Memo (optional)
- Select Review Transfer
- On desktop, go to Transfer & Pay > Transfers
- On mobile, go to More > Transfer & Pay > Transfers
- On the Make a Transfer tab, select your external account as the "From" account
- Select your FSCU account as the "To" account
- Enter the amount and other details. Payments must be scheduled for a future date
- Select Review Transfer
- Select Submit Transfer
- On desktop, go to Transfer & Pay > Transfers
- On mobile, go to More > Transfer & Pay > Transfers
- On the Make a Transfer tab, fill out the transfer form
- Select frequency (One-Time or Recurring)
- In the When drop-down menus, select a Frequency and future Date
- Leave a Memo (optional)
- Review and submit the transfer
- On desktop, go to Transfer & Pay > Transfers
- On mobile, go to More > Transfer & Pay > Transfers
- Select the Scheduled tab
- Select the transfer you want to modify
- Edit or delete the scheduled transfer
- On desktop, go to Transfer & Pay > Transfers
- On mobile, go to More > Transfer & Pay > Transfers
- Select the Activity tab
- View all transfer activity
- Select the ellipsis icon on any transfer to review details
- Go to Transfer & Pay > Wire Money
- Select + New wire
- Review safety precautions
- Select Continue
- Choose wire type: Domestic or International
- Domestic: $20 fee
- International: $40 fee plus corresponding bank charges
- Enter recipient's full name/business and address
- Enter account number, routing number, and financial institution information
- Select Continue
- Enter reason for wire (optional)
- Add intermediary financial institution if applicable (international wires)
- Select the account to wire from and enter the amount
- Select Continue
- Review and select Submit
- Select delivery method for OTP verification
- Enter the OTP code
- Select Send Code
To receive a wire sent to your First Service account, the sender will need the following information:
- Our routing number: 313090561
- The receiving 13-digit account number
- The name of the person receiving the funds
- Our name and address:
First Service Credit Union
16430 Park Ten Place
Houston, TX 77084
Incoming wires are processed throughout the day until 5:00 PM CT each business day.
To use Bill Pay:
On Mobile
From the Dashboard, select Bill Pay from the bottom Banner Menu.
- Read the Bill Pay Agreement
- Select the I Agree checkbox
- Select Continue
- Follow the prompts to set up payees and make payments
Note: Bill Pay is a separate system that may open in a new window.
On Desktop
- Go to Transfer & Pay > Bill Pay
- Read the Bill Pay Agreement
- Select the I Agree checkbox
- Select Continue
- Follow the prompts to set up payees and make payments
Note: Bill Pay is a separate system that may open in a new window.
- Go to Transfer & Pay > Pay Loan By Card
- Enter your SSN and Date of Birth
- Select Next
- If technical issues occur, use the SSO link to open in a separate page
- Select the loan you want to pay
- Select payment type
- Enter payment details (card number, etc.)
- Enter billing address
- Select the acknowledgment checkboxes
- Select Submit Payment
Loan Applications
- On desktop, go to Loans > Apply for a Mortgage
- On mobile, go to More > Loans > Apply for a Mortgage
- Enter your login credentials for FSCU's third-party mortgage service
- If you're a new user, select Create Account
- Follow the account creation steps
- Complete the FSCU mortgage loan application
- On desktop, go to Loans > Apply for a Loan
- On mobile, go to More > Loans > Apply for a Loan
- Select Launch SSO
- Select the Home Loans panel
To get an Instant Loan:
- On desktop, go to Loans > Instant Loan
- On mobile, go to More > Loans > Instant Loan
- If approved, a "Congratulations" message will appear with your loan options
- Select the loan offer
- Select yes/no for automatic payments
- Select first payment date
- Select the I Agree checkbox
- Read the Instant Loan Terms and Conditions
- Select Continue
- Review and confirm loan details
- Select Confirm
- On desktop, go to Loans > Money on Demand
- On mobile, go to More > Loans > Money on Demand
- If approved, a "Congratulations" message will appear
- Enter your monthly income
- Select Submit Income
- Select the loan amount by term length and interest rate
- Select Start Application
- Select the deposit account
- Select Yes or No for automatic payments
- Select first payment date
- Select the I Agree checkbox
- Select Confirm
- Review and confirm the loan details
- Check the confirmation checkbox
- Select Confirm
Account Services
To enroll in or manage eDocuments:
- On desktop, go to Accounts > eStatements
- On mobile, go to More > Accounts > eStatements
- If not already subscribed, select Subscribe under the Overview tab
- Accept the eStatements Agreement by checking the I Agree box
- In the Statements tab, view monthly statements and past documents
- If you experience errors, select the SSO link to open in a separate page
Note: During first-time enrollment on the digital banking app, users will be given the option to opt into eStatements.
- On desktop, go to My Offers > Direct Deposit $250
- On mobile, go to More > My Offers > Direct Deposit $250
- Use the drop-down menu to select the account into which you want your paycheck deposited
- Click Continue
- Follow the instructions to connect your payroll to digital banking
- On desktop, go to Accounts > Check Services
- On mobile, go to More > Accounts > Check Services
- Select the Stop Payment tab
- Select New Stop Pay Request
- Select the account
- Enter optional fields (Check Number, Amount, Payee Name)
- You can select a range of checks or search for transactions
- Select the I Agree checkbox
- Select Submit Request
- Select the Reorder Checks tab
- Choose an Account from the drop-down menu
- Select Next > Order Checks from the third-party site
- On desktop, go to My Benefits > Enroll in Courtesy Pay
- On mobile, go to More > My Benefits > Enroll in Courtesy Pay
- Read and understand the Courtesy Pay information
- Select Accounts and Payment types you would like to opt in to Courtesy Pay
- Select I Agree and Save
To set up Overdraft Protection:
- On desktop, go to Accounts > Overdraft Transfer
- On mobile, go to More > Accounts > Overdraft Transfer
- Select + Select Backup Accounts for your checking account (destination)
- Select + Add as Backup for the account you want to use (source)
- Read the disclosure
- Select the I Agree checkbox
- Select Save Changes
To link multiple backup accounts:
- Repeat the process to add additional backup accounts
- Use the trash can icon to delete a backup arrangement
Financial Wellness
To transfer your investments:
Through First Service Wealth Management (no cost)
- Call 713.676.4356 or email wealthmanagement@fscu.com
- Request an ACAT transfer to First Service Wealth Management
- Provide your EasyVest account details from the DriveWealth portal
- Contact the brokerage of your choice
- Request an ACAT transfer from your EasyVest account
- Provide your EasyVest account details from the DriveWealth portal
- Go to Financial Wellness
- Select the Spending tab
- View your monthly spending in the bar graph
- Select a bar to view detailed monthly spending
- Under Categories, select the circular bar to see spending breakdown by category
- Under Transactions, select a transaction for more details
- On desktop, go to Transfer & Pay > IRA Rollover
- On mobile, go to More > Transfer & Pay > IRA Rollover
- Review the Disclosure Information
- Select Rollover or Transfer
- Select Initiate Request
- Follow any remaining prompts to complete the process
- One of our financial advisors will reach out to you regarding your request
To complete the Financial Wellness assessment:
- Go to Financial Wellness > Financial Health
- Select Start Here
- Complete the survey questions covering:
○ Bill payments
○ Saving habits
○ Spending management
○ Future planning
You can exit at any time and complete it later by selecting the X at the top right of the panel and then "Yes, exit survey." Your answers will not be saved
- Go to Financial Wellness > Savings Goals
- Select + to create a Savings Goal
- Select the desired savings account
- Select Next
- Select a category (e.g., Home Purchase)
- Select Next
- Enter:
- Title
- Goal Amount
- Target Date
- Select Create Goal
To manage existing goals:
- Select the Goal icon to view details
- Select Add Money to contribute to the goal
- Use Edit to modify goal details
- Use Delete to remove the goal
- On desktop, go to My Benefits > PAC Donations
- On mobile, go to More > My Benefits > PAC Donations
- Select the account to donate from
- Enter the donation amount
- Enter an optional memo
- Select Review Donation
- Review the donation details
- Confirm and Submit donation
- On desktop, go to My Benefits > Semester Earnings
- Select your child’s Bongo account. If you do not have a Bongo account, you will be prompted to make one
- Upload a PDF, JPG, or PNG of your child's report card. File size cannot be larger than 8 MB
- Review your submission and acknowledge that the uploaded grades meet the passing criteria
- Select Submit
- If the criteria are met, the Semester Earnings reward for the Bongo account will appear in the account
Appointments & Support
- Go to Connect with Us > Request an Appointment
- Provide the requested information
- Select Confirm to submit your request
● Calling the Contact Center at (713) 676-7777
- Monday-Friday: 7:30 AM to 6:30 PM Central Time
- Saturday: 9:00 AM to 2:00 PM Central Time
Additional Questions
- Go to Person Icon > Settings > Accounts
- Select Reorder Accounts
- Drag and drop accounts within their category groups
- Select Save Order